| Serving Iowa City, Coralville and surrounding areas | 319-930-9781 | michaelstalkfleet@gmail.com |
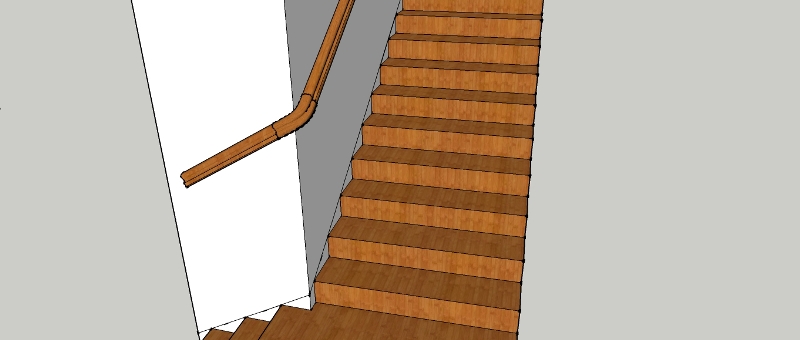
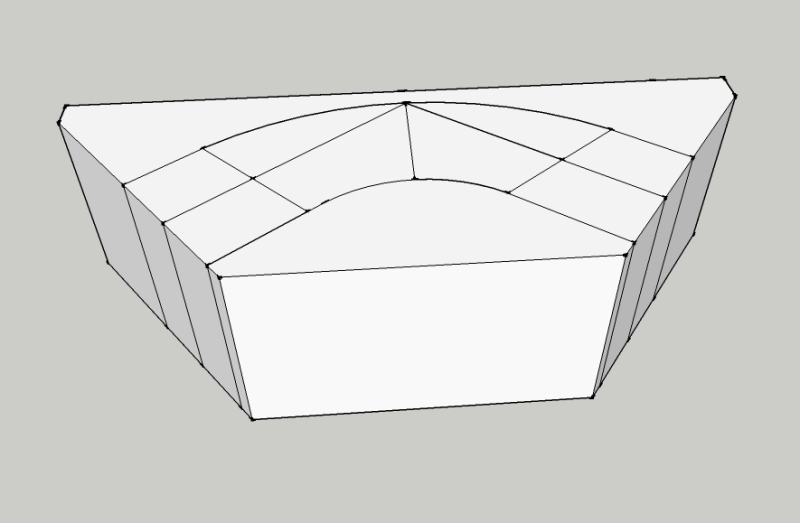
Wreath and tangent handrailingWhat I wanted to end up with is something that looked like this:
It is a railing that comes down the stairs and bends around the corner and keeps going for another few feet. There is no way to cut two pieces of railing so that they negotiate that corner. The only way to do this is either to 1)make a series of small pieces to make a jagged turn (as illustrated by the picture below on the right, with two easings, a 90 degree turn, and a gooseneck) or 2) you can cut a wreath (center picture).
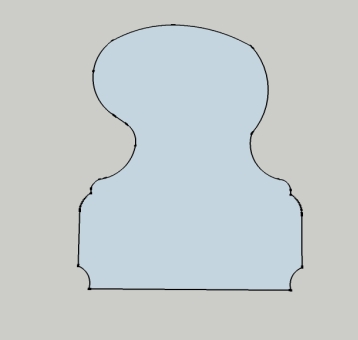
To complicate the matter, this house had some existing balcony railing of a type that was commonly used in Craftsman houses in the 1920s, but that you can't get anymore. You can't get the shaper or router bits to make the railing either (at least without getting them made custom). But the profile looks about like this:
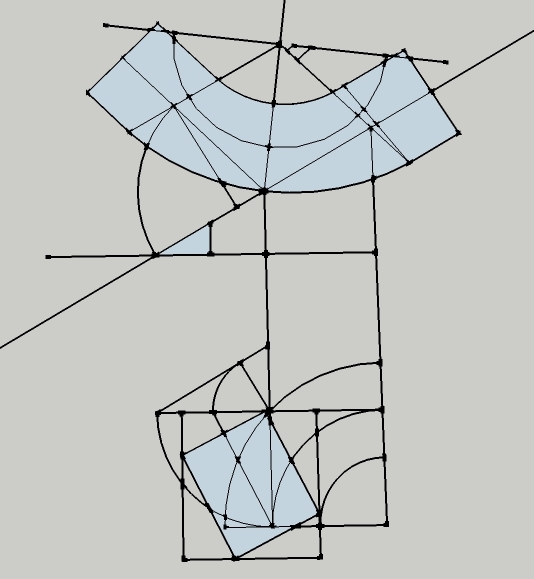
It is 3" tall and 2.5" wide, and the deeper finger groove faces the wall. I bought some 14' 2" thick pieces of red oak, milled them up, glued up the railing blanks, milled those blanks to the final dimensions, then using various router bits (no specialty bits just core box and roundover) and multiple passes with a router and edge guide, I made 20' of railing for this project. Then it was on to making the wreath. Wreath and tangent handrailing used to be in common use, you can still see some good examples of it in old hotels and mansions from the lates 1800s and early 1900s. Although many books from that time were printed on the subject, most of them I think assumed that you had already apprenticed with a master railing carpenter and pretty much knew what you were doing. But when wreath railings fell out of favor, a lot of those skills and trade knowledge that were once common were largely forgotten. And today if you want restart a lost art, you need to put together a lot of bits and pieces of information from various sources to iron out the logistics of laying out and carving a block of wood to look as if it was precisely twisted to fit a bend around and up a corner. The basic stages of doing a wreathed railing are roughly: 1)getting the layout from the actual stairs you are installing the railing on and deciding on a railing style, 2)making a "face mould" (see below) to negotiate the corner, 3)using that face mould to layout your wreath blank, 4)roughing the wreath blank, 5)carving the wreath blank, 6)final fitting and installing the railing, 7)finishing the railing. What I have written below has focused on the 3rd and 4th steps, because I was able to find the least amount of information on that subject, and when I finally was able to figure it out, I thought I should share what I had learned. To start making the face mould you'll need to know the basics of the railing system you are making the wreath for. If the stairs have different pitches, or if you are making a wreath that goes from level to rake, etc, the geometry for the face mould will differ from what I describe below and you'll have to consult a reference for that. What I am showing is when both pitches are 30 degrees. But you need to know the pitch of both flights of the stairs, the radius of curvature for the wreath (in my case it was 3"), and the profile and dimensions of the railing you are using (mine was 3" tall by 2.5" wide). There is a fair amount of geometry involved in making a face mould, and it looks like a mess in finished form, but once you really dig into it, it's not that complicated. (You should also have at least a couple reference books on the subject if you are going to attempt this.)
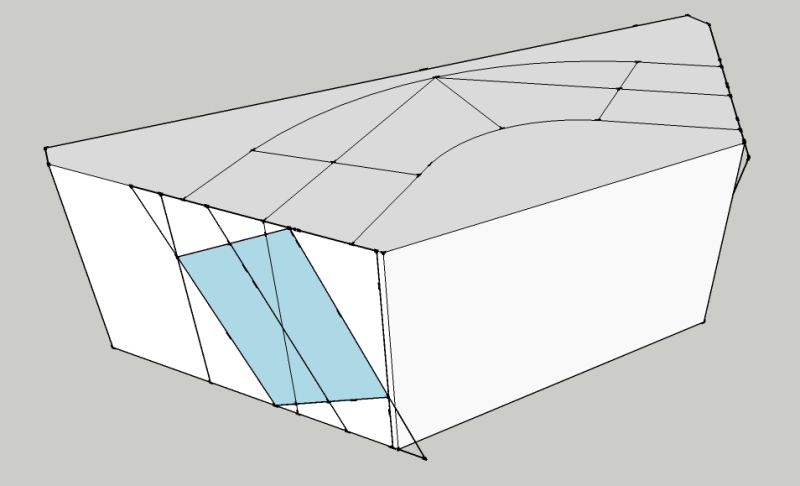
I am going to assume that you have your face mould done. The face mould is the macarroni shaped blue piece and the angled blue square is what you use to mark the butt ends of the wreath to give you the twist angles and layouts for shifting the mould. Transfer both of those drawing to tracing paper. Now you glue up a blank for your wreath. Make sure it is oversize in length and width, but plane it to the exact height of the box that surrounds the angled blue square. Trace your face mould on the top of the blank, leaving about 3/4" inch margin of wood around your face mould.
Cut the butt ends of your blank on the miter saw.
Line up the centerline of the angled box with the centerline of the face mould and transfer your layouts, do this for both ends, and make sure they twist in the direction you want.
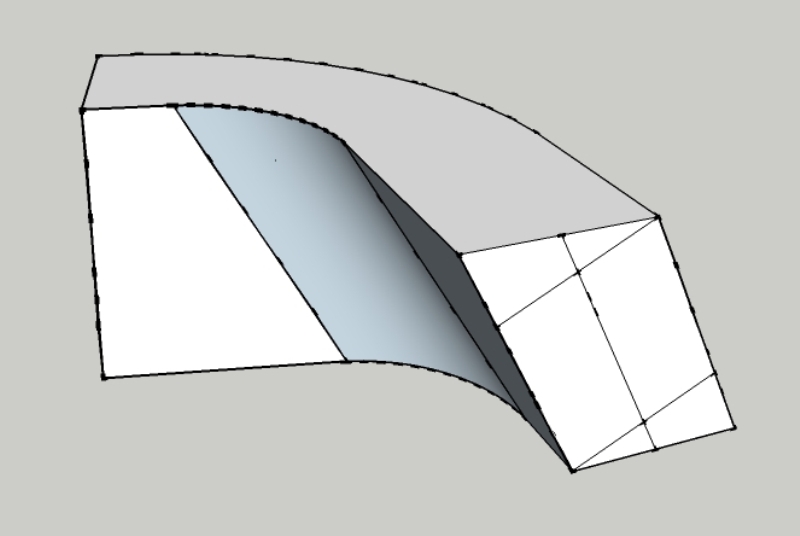
Now you need to "shift the face mould" to get the correct top and bottom positions for the face mould. You start by extending the angled centerline of the blue box up and across the top of the wreath blank on both ends, on the top and bottom. Then move your face mould so that its centerlines match up with those. Trace that with a sharpie.
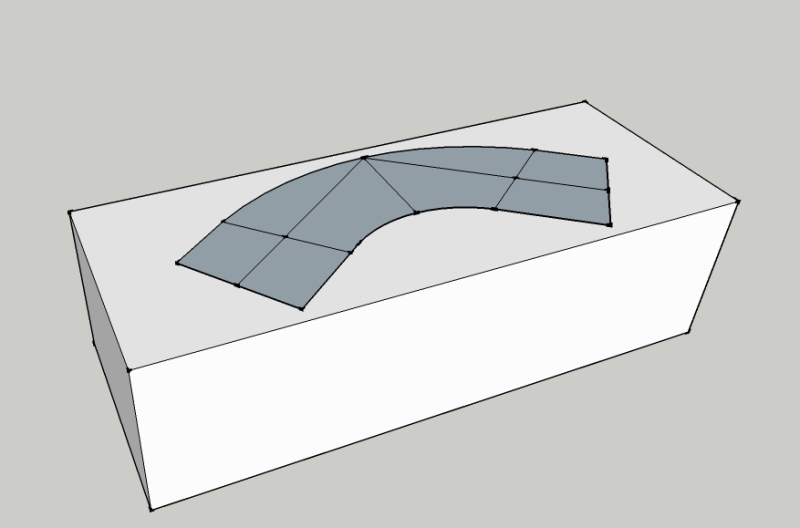
Now you are ready to cut out your wreath. The easiest way to do this is to build a little stand out of wood that will hold your blank at the exact pitch of the stairs and run it through the bandsaw. The graphic below is a little distorted from the angles, but the wreath blank is set up so that the sides of both squares on the ends will be cut plumb in this position. In my case the stand is 30 degrees in both directions. Don't use nails, as you will be cutting through the stand.
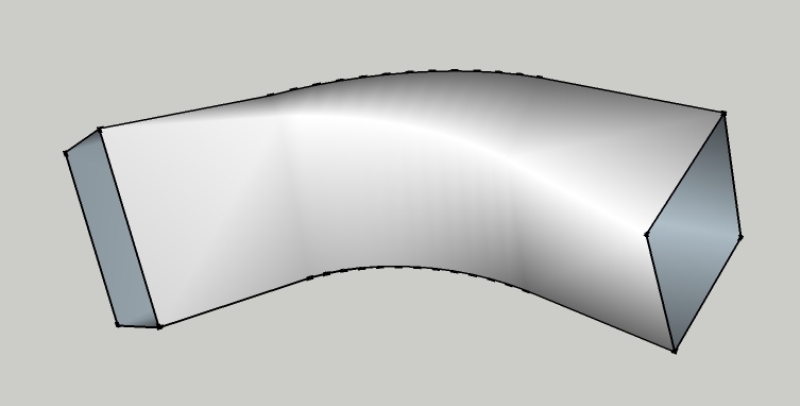
This what it will look like if you cut it correctly.
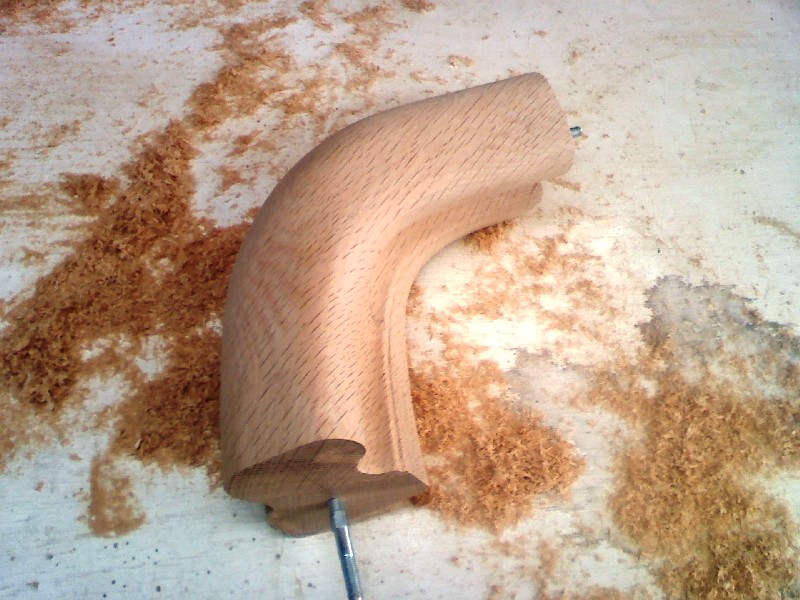
Now you turn it on its side and run it through the bandsaw again to square the top and bottom of the wreath. You have to be careful, because it is a real squirrely cut to make that involves rolling the wreath through the blade, and it is not well supported. If you did it right you will have your completed rough wreath.
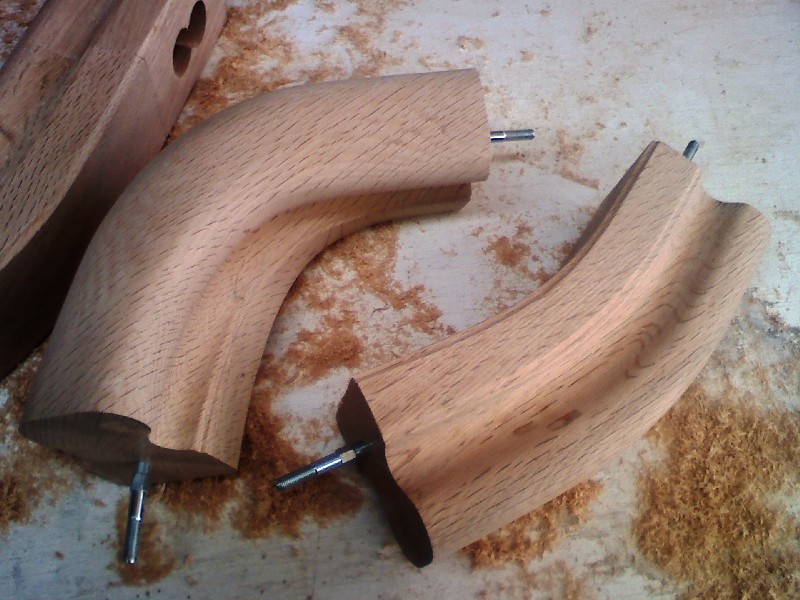
Now you'll need to carve it, but I won't go into that here, mostly because I didn't take any pictures while I was doing it. There are some really good pointers for the processs at http://www.thisiscarpentry.com/2011/07/01/carving-a-volute/ But once all the painstaking carving was finished, I had a completed wreath and two easings (for transitioning from angled to level at the top and bottom of the staircase).
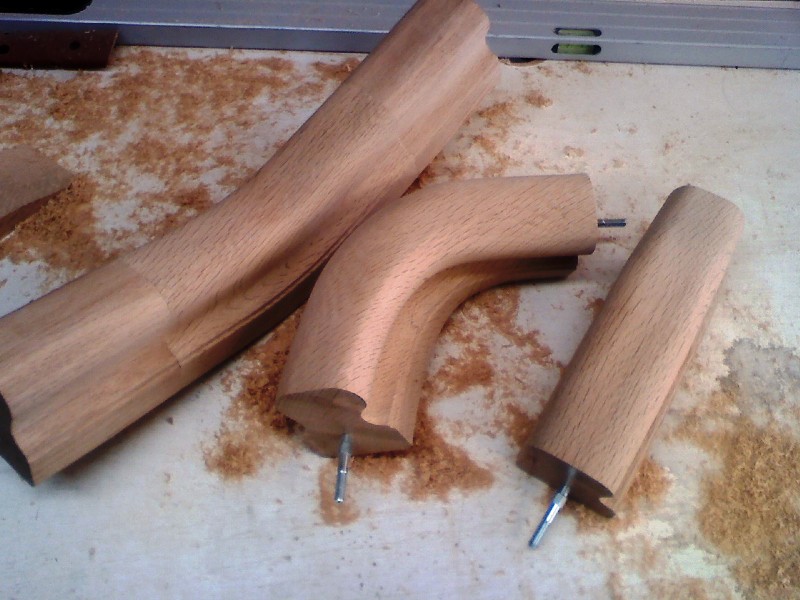
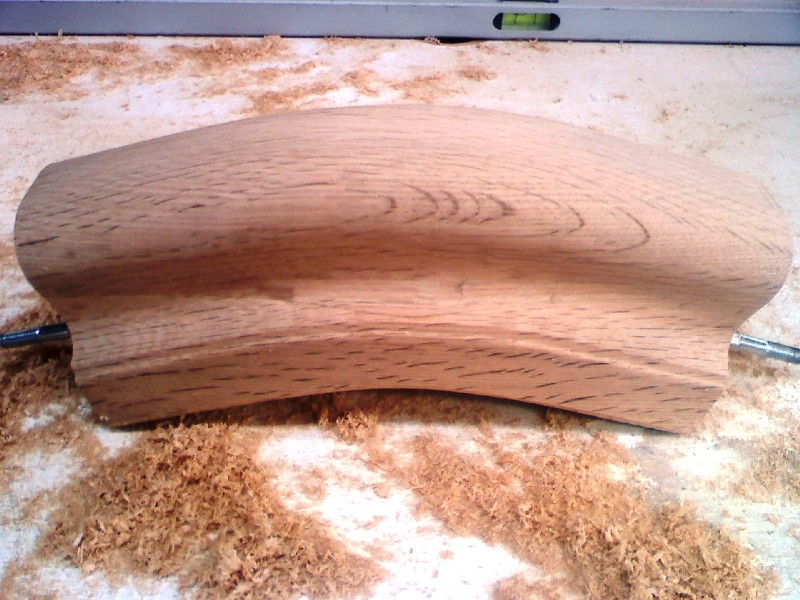
Finished wreath and easings (there are extra pieces attached to the left easing to facilitate matching the profile of the railing).
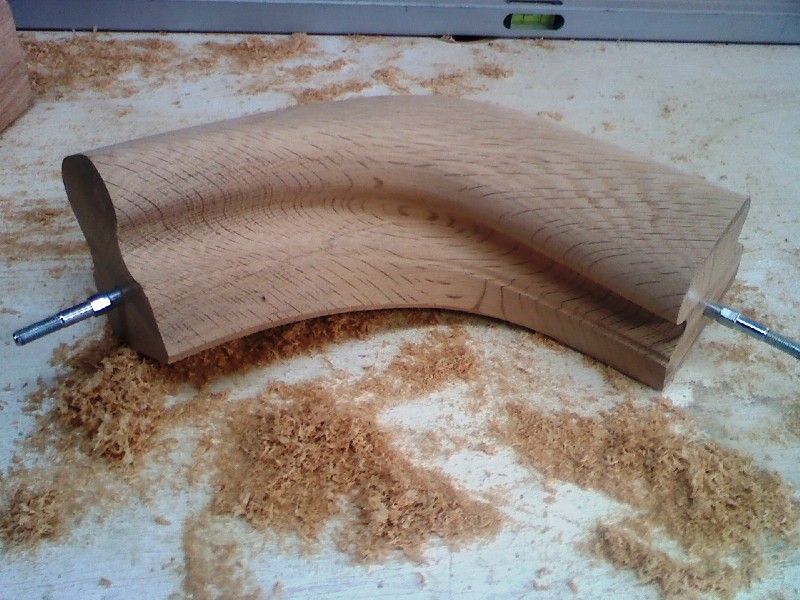
Wreath
Wreath again
Downeasing
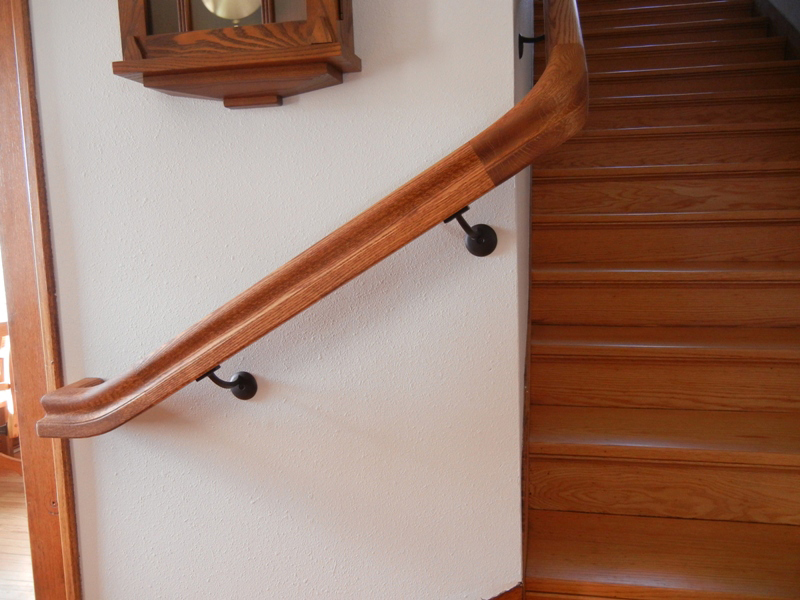
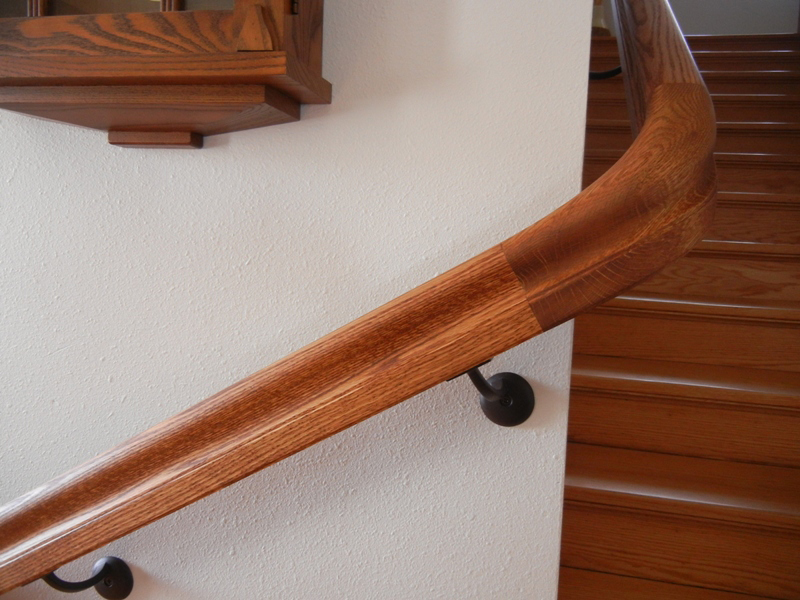
Wreath/tangent handrail, stained golden oak, finish with pallman hard wax oil.
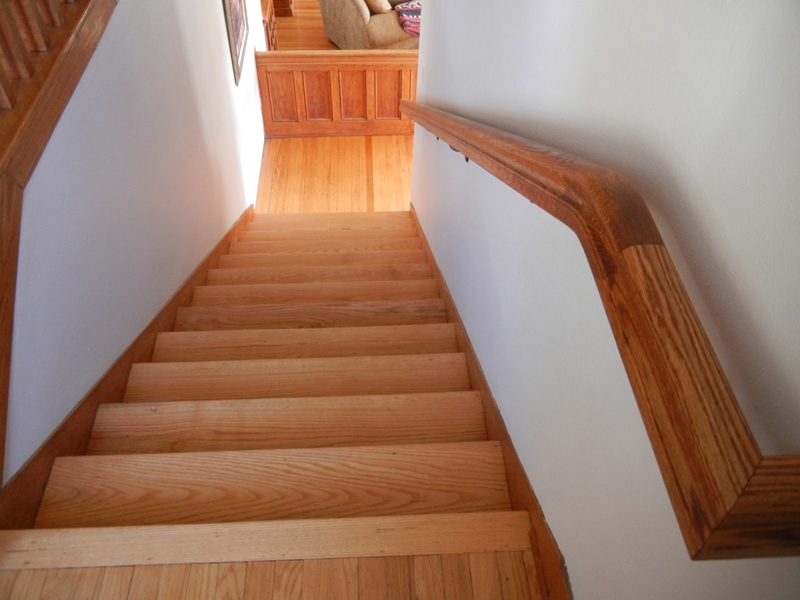
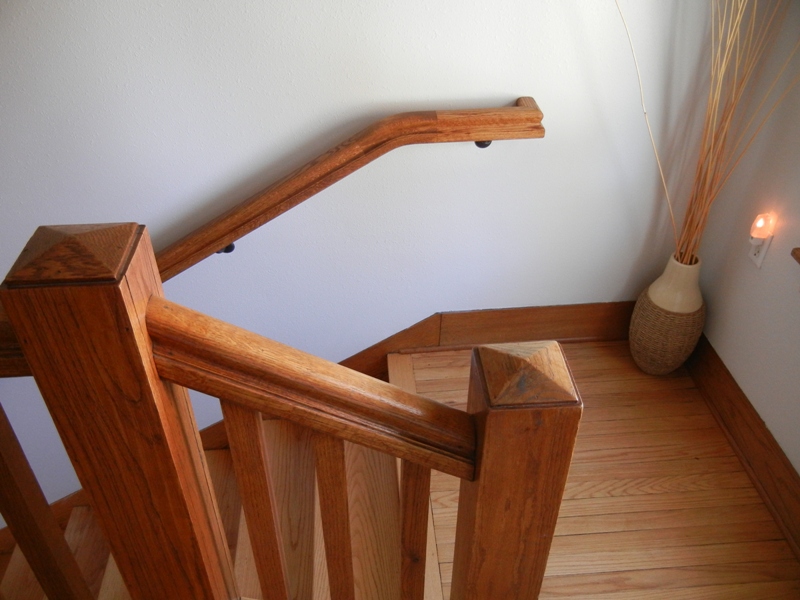
Had to do a miter on the upeasing to do the return to the wall.
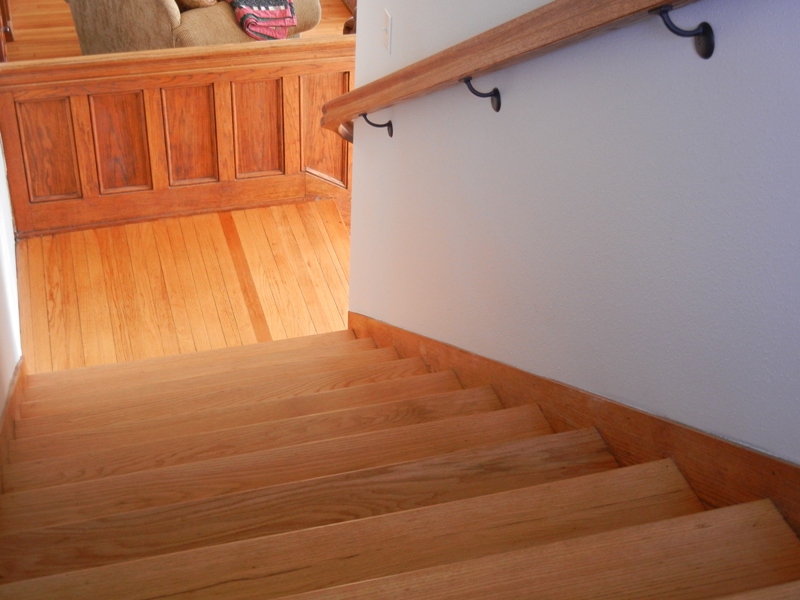
In the foreground you can see the original railing system, and the new railing in the background looks like a good match.
So, if you want or need a super fancy railing that has all the charm and class that the gilded age had to offer, drop me a line. |
||
© 2015 Mike Stalkfleet |
||